Welcome To Hebei Xiongan Hengyun Technology Co., Ltd.
language
English
العربية
বাংলাদেশ
Български
Hrvatski
Česky
Dansk
Nederland
 Esperanto
Slovenski
Filipino
Suomi
Français
Maori
 Shqiptare
Georgian
 Euskara
Deutsch
Ελλάδα
ישראל
इंडिया
Magyarország
Ísland
Indonesia
Irlanda
Italia
日本語
Sovensko
Հայաստան
한국
Kyrgyz
ປະເທດລາວ
 Zulu
Latvian
Lithuanian
Luxembourgish
 Latinus
Macedonian
Малайская
Maltese
Монгол улс
 Cymraeg
ဗမာ
 தமிழ்
नेपाल
Norge
ایران
Polska
Portugal
România
Российская
Србија
 Slovak
Србија
 Slovak
Bosanski
Slovenian
Беларус
España
Sverige
Точик
ประเทศไทย
Türk
Azərbaycan
Uzbek
 Afrikaans
Việt Nam



Step-by-Step Guide: Installing Fiberglass Corner Mesh Like a Pro
2023-09-16
Table of Contents:
1. Introduction
2. Understanding Fiberglass Corner Mesh
3. Tools and Materials Needed
4. Preparing the Surface
5. Applying Adhesive
6. Installing the Fiberglass Corner Mesh
7. Trimming Excess Mesh
8. Applying Joint Compound
9. Sanding and Finishing
10. Frequently Asked Questions (FAQs)
11. Conclusion
1. Introduction
Installing fiberglass corner mesh is an essential step in achie
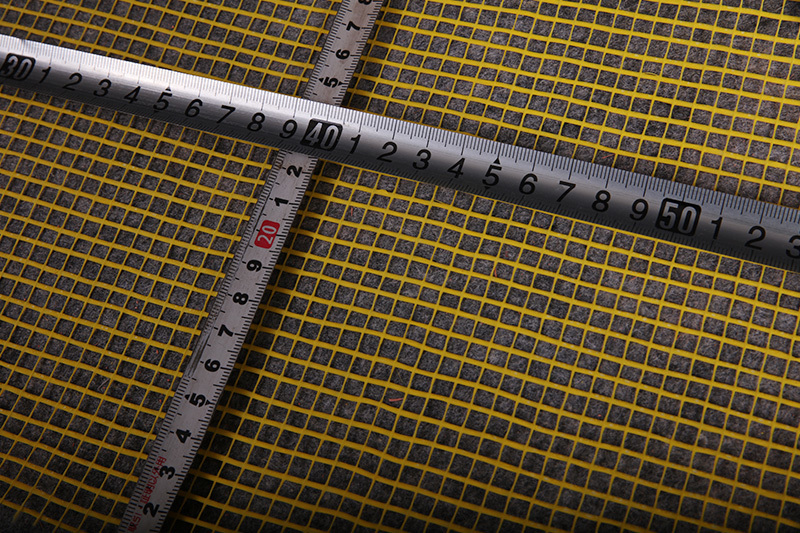
Table of Contents:
1. Introduction
2. Understanding Fiberglass Corner Mesh
3. Tools and Materials Needed
4. Preparing the Surface
5. Applying Adhesive
6. Installing the Fiberglass Corner Mesh
7. Trimming Excess Mesh
8. Applying Joint Compound
9. Sanding and Finishing
10. Frequently Asked Questions (FAQs)
11. Conclusion
Installing fiberglass corner mesh is an essential step in achieving a professional-looking finish when working on drywall corners. This guide will provide you with a detailed walkthrough of the installation process, from understanding the material to applying the final touches.
Fiberglass corner mesh is a reinforcing material used to provide extra strength and durability to drywall corners. It helps prevent cracking and improves the longevity of the finished surface. Made from woven fiberglass, the mesh is easy to work with and adheres well to the drywall.
- Enhanced strength and durability
- Prevents cracking and damage
- Easy to apply and work with
- Provides a professional finish
When selecting fiberglass corner mesh, it's important to consider the width and length that best suits your project. Ensure the mesh is compatible with the joint compound you plan to use.
Before you begin the installation process, gather the following tools and materials:
- Utility knife
- Trowel
- Sanding block
- Drywall joint compound applicator
- Corner trowel
- Measuring tape
- Fiberglass corner mesh
- Drywall joint compound
- Adhesive
- Sandpaper (grit 120 and 220)
- Drop cloths
Proper surface preparation is crucial for a successful installation. Follow these steps to ensure a clean and smooth surface:
Remove any furniture or obstacles from the work area, and cover the floor with drop cloths to protect it from debris.
Use a damp cloth or sponge to remove dust, dirt, and grease from the corner.
If the corner has any rough or uneven areas, use sandpaper to smooth them out. Avoid applying excessive pressure, as it may damage the drywall.
To ensure a secure bond between the fiberglass corner mesh and the corner, follow these steps:
Select a high-quality adhesive suitable for drywall applications. Consult the manufacturer's instructions for specific recommendations.
Using a trowel, apply a thin layer of adhesive to the corner. Ensure the adhesive covers the entire corner evenly.
Follow these steps to install the fiberglass corner mesh:
Measure the length of the corner and cut the fiberglass mesh accordingly, leaving an extra inch at each end.
Carefully position the mesh onto the adhesive-covered corner, ensuring it aligns with the edges. Press it firmly into place.
After installing the fiberglass corner mesh, trim the excess to achieve a neat finish:
Using a utility knife, carefully cut off the excess mesh at each end of the corner. Ensure a clean and straight cut.
Applying joint compound helps create a seamless transition between the drywall and the fiberglass corner mesh:
Using a drywall joint compound applicator, apply the first coat of joint compound over the fiberglass mesh. Ensure even coverage and feather out the edges.
Allow each coat to dry before applying the next. Apply additional coats as needed until the mesh is fully covered and the surface is smooth.
Achieve a flawless finish by following these sanding and finishing steps:
Once the joint compound is dry, use a sanding block with 120-grit sandpaper to smooth the surface. Follow up with 220-grit sandpaper for a finer finish.
Remove any dust or debris from the sanded surface using a damp cloth or sponge. Allow the surface to dry before proceeding.
Inspect the surface for any imperfections and apply additional joint compound if necessary. Sand and clean the surface again before applying paint or wallpaper.
Q1: How long does it take for the adhesive to dry?
A1: The drying time of the adhesive may vary depending on the brand and environmental conditions. Refer to the manufacturer's instructions for specific drying times.
Q2: Can fiberglass corner mesh be used on both internal and external corners?
A2: Yes, fiberglass corner mesh is suitable for both internal and external corners. It provides reinforcement and prevents cracking in any corner application.
Q3: Can I paint over the fiberglass corner mesh?
A3: Yes, once the joint compound is dry and the surface is prepared, you can paint over the fiberglass corner mesh to match the surrounding walls.
Q4: How do I repair a cracked fiberglass corner mesh?
A4: If the fiberglass corner mesh becomes damaged or cracked, you can remove the affected area, reapply adhesive, and install a new piece of mesh following the same steps as the initial installation.
Q5: Can I use fiberglass corner mesh on uneven corners?
A5: It is recommended to address any unevenness in the corner before installing the fiberglass mesh. Sanding or leveling the corner will help ensure a smooth and professional finish.
By following this step-by-step guide, you can confidently install fiberglass corner mesh like a pro. Remember to prepare the surface properly, apply adhesive evenly, and trim excess mesh for a seamless finish. With the right tools and techniques, you'll achieve a durable and professional-looking corner that enhances the overall aesthetics of your project.
1. Introduction
2. Understanding Fiberglass Corner Mesh
3. Tools and Materials Needed
4. Preparing the Surface
5. Applying Adhesive
6. Installing the Fiberglass Corner Mesh
7. Trimming Excess Mesh
8. Applying Joint Compound
9. Sanding and Finishing
10. Frequently Asked Questions (FAQs)
11. Conclusion
1. Introduction
Installing fiberglass corner mesh is an essential step in achieving a professional-looking finish when working on drywall corners. This guide will provide you with a detailed walkthrough of the installation process, from understanding the material to applying the final touches.
2. Understanding Fiberglass Corner Mesh
Fiberglass corner mesh is a reinforcing material used to provide extra strength and durability to drywall corners. It helps prevent cracking and improves the longevity of the finished surface. Made from woven fiberglass, the mesh is easy to work with and adheres well to the drywall.
2.1 Benefits of Fiberglass Corner Mesh
- Enhanced strength and durability
- Prevents cracking and damage
- Easy to apply and work with
- Provides a professional finish
2.2 Choosing the Right Type of Fiberglass Corner Mesh
When selecting fiberglass corner mesh, it's important to consider the width and length that best suits your project. Ensure the mesh is compatible with the joint compound you plan to use.
3. Tools and Materials Needed
Before you begin the installation process, gather the following tools and materials:
3.1 Tools
- Utility knife
- Trowel
- Sanding block
- Drywall joint compound applicator
- Corner trowel
- Measuring tape
3.2 Materials
- Fiberglass corner mesh
- Drywall joint compound
- Adhesive
- Sandpaper (grit 120 and 220)
- Drop cloths
4. Preparing the Surface
Proper surface preparation is crucial for a successful installation. Follow these steps to ensure a clean and smooth surface:
4.1 Clearing the Area
Remove any furniture or obstacles from the work area, and cover the floor with drop cloths to protect it from debris.
4.2 Cleaning the Corner
Use a damp cloth or sponge to remove dust, dirt, and grease from the corner.
4.3 Sanding
If the corner has any rough or uneven areas, use sandpaper to smooth them out. Avoid applying excessive pressure, as it may damage the drywall.
5. Applying Adhesive
To ensure a secure bond between the fiberglass corner mesh and the corner, follow these steps:
5.1 Choosing the Right Adhesive
Select a high-quality adhesive suitable for drywall applications. Consult the manufacturer's instructions for specific recommendations.
5.2 Applying the Adhesive
Using a trowel, apply a thin layer of adhesive to the corner. Ensure the adhesive covers the entire corner evenly.
6. Installing the Fiberglass Corner Mesh
Follow these steps to install the fiberglass corner mesh:
6.1 Measuring and Cutting
Measure the length of the corner and cut the fiberglass mesh accordingly, leaving an extra inch at each end.
6.2 Placing the Mesh
Carefully position the mesh onto the adhesive-covered corner, ensuring it aligns with the edges. Press it firmly into place.
7. Trimming Excess Mesh
After installing the fiberglass corner mesh, trim the excess to achieve a neat finish:
7.1 Trimming the Excess Mesh
Using a utility knife, carefully cut off the excess mesh at each end of the corner. Ensure a clean and straight cut.
8. Applying Joint Compound
Applying joint compound helps create a seamless transition between the drywall and the fiberglass corner mesh:
8.1 Applying the First Coat
Using a drywall joint compound applicator, apply the first coat of joint compound over the fiberglass mesh. Ensure even coverage and feather out the edges.
8.2 Applying Subsequent Coats
Allow each coat to dry before applying the next. Apply additional coats as needed until the mesh is fully covered and the surface is smooth.
9. Sanding and Finishing
Achieve a flawless finish by following these sanding and finishing steps:
9.1 Sanding the Surface
Once the joint compound is dry, use a sanding block with 120-grit sandpaper to smooth the surface. Follow up with 220-grit sandpaper for a finer finish.
9.2 Cleaning the Surface
Remove any dust or debris from the sanded surface using a damp cloth or sponge. Allow the surface to dry before proceeding.
9.3 Applying Final Touches
Inspect the surface for any imperfections and apply additional joint compound if necessary. Sand and clean the surface again before applying paint or wallpaper.
10. Frequently Asked Questions (FAQs)
Q1: How long does it take for the adhesive to dry?
A1: The drying time of the adhesive may vary depending on the brand and environmental conditions. Refer to the manufacturer's instructions for specific drying times.
Q2: Can fiberglass corner mesh be used on both internal and external corners?
A2: Yes, fiberglass corner mesh is suitable for both internal and external corners. It provides reinforcement and prevents cracking in any corner application.
Q3: Can I paint over the fiberglass corner mesh?
A3: Yes, once the joint compound is dry and the surface is prepared, you can paint over the fiberglass corner mesh to match the surrounding walls.
Q4: How do I repair a cracked fiberglass corner mesh?
A4: If the fiberglass corner mesh becomes damaged or cracked, you can remove the affected area, reapply adhesive, and install a new piece of mesh following the same steps as the initial installation.
Q5: Can I use fiberglass corner mesh on uneven corners?
A5: It is recommended to address any unevenness in the corner before installing the fiberglass mesh. Sanding or leveling the corner will help ensure a smooth and professional finish.
11. Conclusion
By following this step-by-step guide, you can confidently install fiberglass corner mesh like a pro. Remember to prepare the surface properly, apply adhesive evenly, and trim excess mesh for a seamless finish. With the right tools and techniques, you'll achieve a durable and professional-looking corner that enhances the overall aesthetics of your project.
fiberglass corner mesh
Related news



We produce building materials with glass fiber as the main product.Production headquarters is located in Xiongan New District.


Contact
Room 209, Building S6, 001 Baojing Road North, xiongxian, Baoding, Hebei

Learn more